
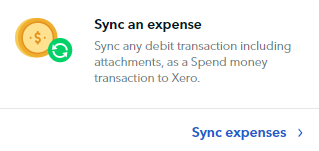
What is the Sync Expense feature for Xero?
The Sync expense for Xero is a feature that allows you to sync any expense directly from Aspire to Xero. You will be able to create Spend money transactions on Xero, including all expense details and attachments.
All you have to now do is reconcile the expense on Xero!
Who can use the Sync expenses feature with Xero?
Any user who has access to the accounting features, i.e Admins and Finance users can access the Sync expenses feature
What are the fields that will be synced with Xero, when using Sync expenses?
You will be able to review and fill all the fields that you need to create a Spend Money transaction on Xero, including the Xero account, Tax rate, and Xero tracking categories, directly from Aspire before you sync a transaction. All values along with the receipts attached to the transaction will be synced with Xero
How to set up the Xero Expense Sync in Aspire
1. Access the Sync expenses workflow

The Sync expenses feature can be accessed from the Xero homepage, once you have connected your Aspire account to Xero.
2. Map your Xero accounts to Aspire Categories
Click on the Sync an expense tab. You will then be asked to Map your Xero accounts:
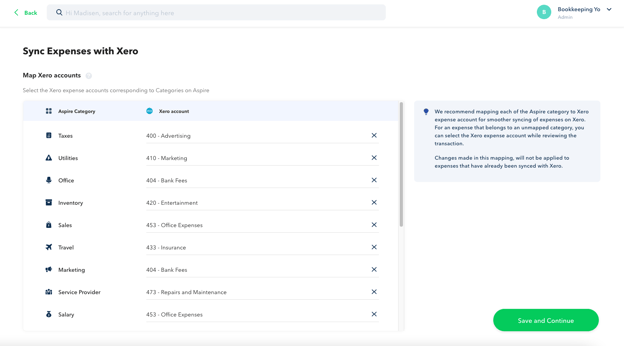
You can set up a mapping between your Aspire categories and your Xero chart of accounts on this screen.
Once you map a Xero account to an Aspire category, any expense in that category will automatically be linked to the mapped Xero account.
You can always update the Xero account for any individual transaction or update this mapping later.
3. Review and Sync your transactions
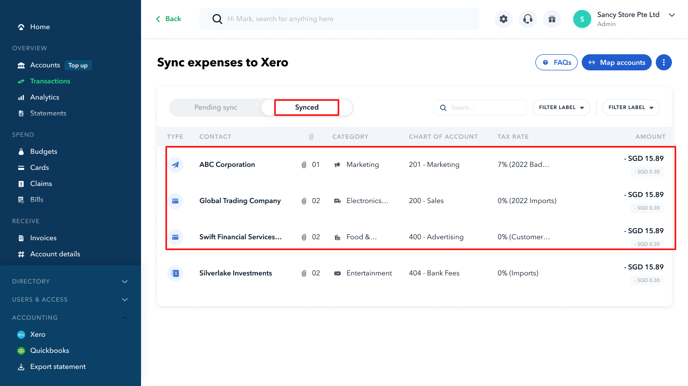
The Sync expenses workflow has two different statuses - Pending Sync and Synced. You can switch between these tabs at any time
Under Pending Sync, you can edit the transaction's expense details before they are synced to Xero. Follow this step-by-step:
-
- Select the transaction that you want to edit
- Update the field values.
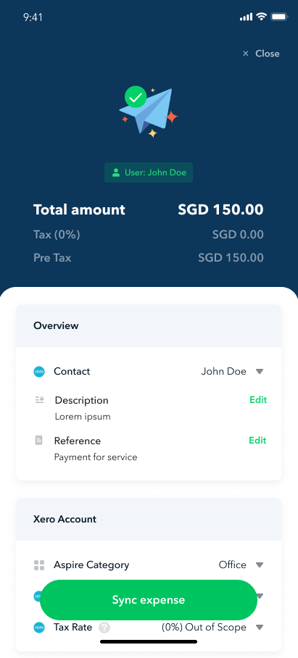
- Once you are done, you can click on "Sync expense". This will sync your transaction to Xero and move it to the Synced tab.
You can also select multiple transactions and sync them directly to Xero. Follow the steps by steps below:
-
- Click on Transactions under Overview Tab
- Click Sync Expenses to Xero
%20(1).png?width=688&height=387&name=258%20(1)%20(1).png)
- Under Pending Sync, select the transactions that you want to sync. Once selected, click on Sync Expenses
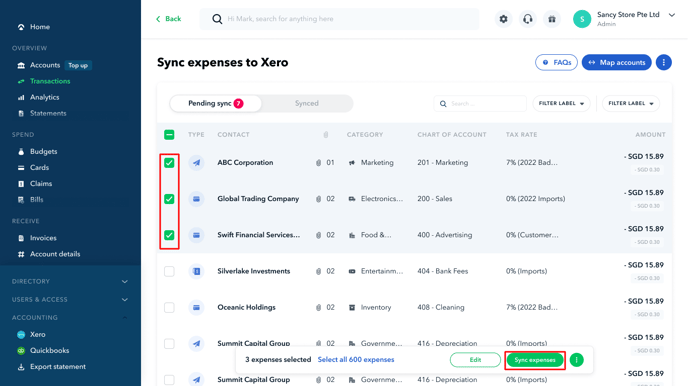
- Once transactions are synced, they will be moved to the Synced tab
.png?width=611&height=344&name=142-1-1-%20(1).png)
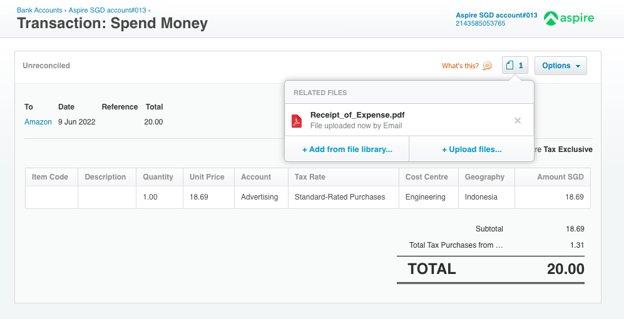
All synced transactions are created in the relevant Xero account as Spend Money transactions, along with their attachments:
Note: When syncing your transactions to Xero, you can only select a maximum of 1000 transactions at a time.
TROUBLESHOOTING
The expenses sync feature is disabled on my Xero homepage
The expenses sync feature will only be available once you have connected at least one of your Aspire accounts to Xero. You can click on the Connect Now button to connect your bank accounts to Xero and sync your bank statements.
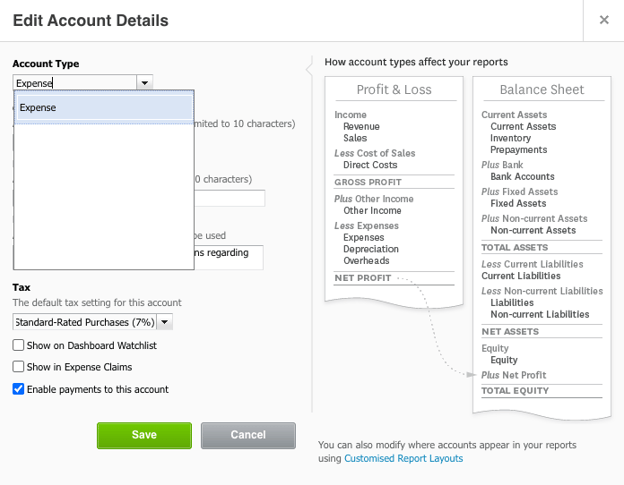
I am unable to find some of my Xero accounts when I try to fill them in Aspire
To sync expenses to a Xero account, you need to enable payments to the account. You can do this by going to the Xero Chart of accounts and selecting "Enable payments to this account" for the Xero account you want to use.
Questions? Please log in to the app and reach out in the chat at the bottom right corner of the screen.
Suggestions? Let us know here.