
Users can either manually or auto-match receipts to transactions!
Click the links below to learn how to do these in-app:
- How to upload receipts to your Aspire account
- How to match uploaded receipts to transactions
- How to enable or disable auto-match receipts to transactions
How to upload receipts to your Aspire account
There are 3 convenient methods for users to upload up to 20 receipts simultaneously to their Aspire account:
Method 1: Upload receipts via Aspire account
1. Go to "Transactions" tab, then click "Match uploaded receipts" on the upper part of the page

2. Click "Add receipts" button on the upper right part of the page

3. Upload the receipts from your device and once uploaded, you can match the receipts to your transactions.
Tip! To conveniently access upload receipts feature in the future, you can add them to your Quick Access in the Dashboard. Simply click on "Add", search for "Upload Receipts", put a check on the feature, and click "Save".

Method 2: Send receipts using your company's unique email address
To see your company's unique email address for uploading receipts:
1. Go to "Transactions" tab
2. Click "Match uploaded receipts" on the upper part of the page

3. You can copy your company's unique email address

4. Email your receipts to the provided unique email address to upload them to your Aspire account. Once uploaded, you can match them to your transactions.
Method 3: Upload receipts from your mobile gallery
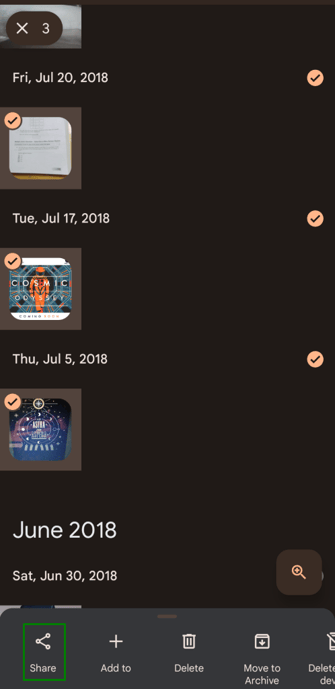
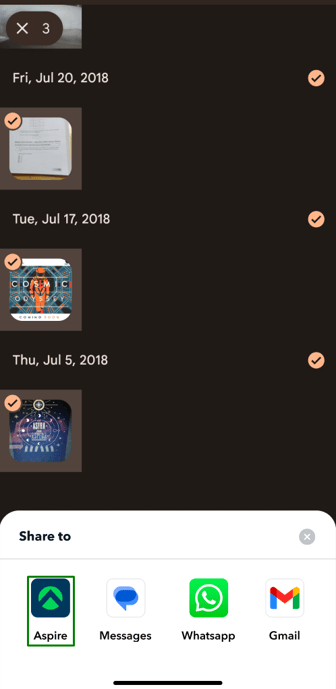
1. Select the desired receipts from your mobile photo gallery, then click on the "Share" option and choose the Aspire mobile application.
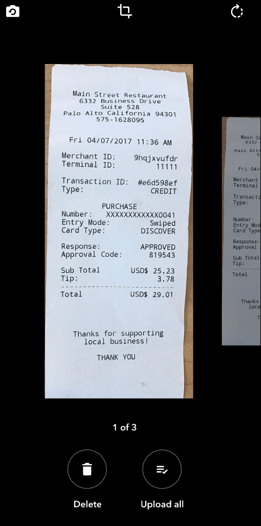
2. You'll be routed to the Aspire application to login to your account
3. After logging in, review the photos to upload. Delete unwanted photos with a click of the "Delete" button. To upload all photos, click "Upload all."
4. Once the receipts are uploaded, you will be asked to match them to the specific transactions on your Aspire account.
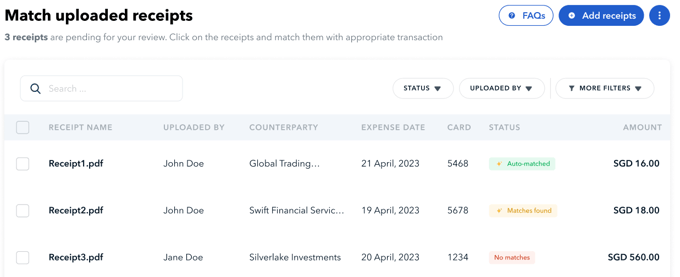
How to match uploaded receipts to transactions
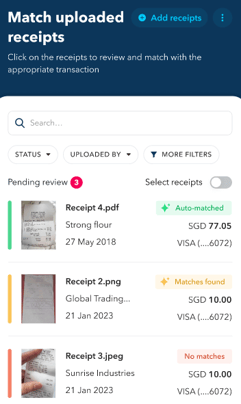
If you have uploaded the receipts through your Aspire account or mobile gallery, you will be directed to a page where you can easily match them to the corresponding transactions in your Aspire account.
If you send the receipts via email to your company's unique email address, you may review the receipts in Aspire by following the steps below:
1. Go to "Transactions" tab
2. click "Match uploaded receipts" on the upper part of the page

3. Select a receipt from the table to match it with a transaction
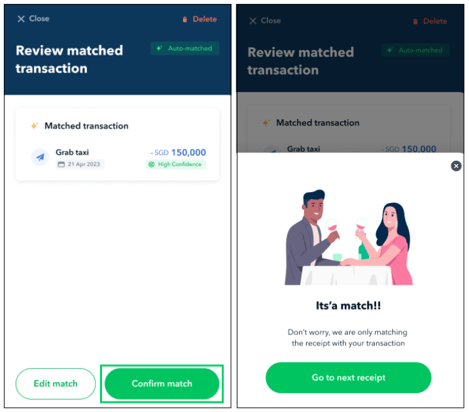
For ![]() receipts, take a moment to review if the matched transaction is correct. If everything looks good, click on the "Confirm match" button.
receipts, take a moment to review if the matched transaction is correct. If everything looks good, click on the "Confirm match" button.
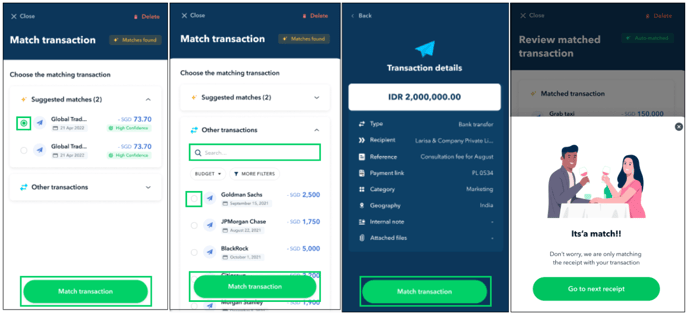
For ![]() receipts, you have two options: You can either select the transaction from the list of suggested matches or manually search for the transaction. Once you have selected the correct transaction, simply click on the "Match transaction" button.
receipts, you have two options: You can either select the transaction from the list of suggested matches or manually search for the transaction. Once you have selected the correct transaction, simply click on the "Match transaction" button.
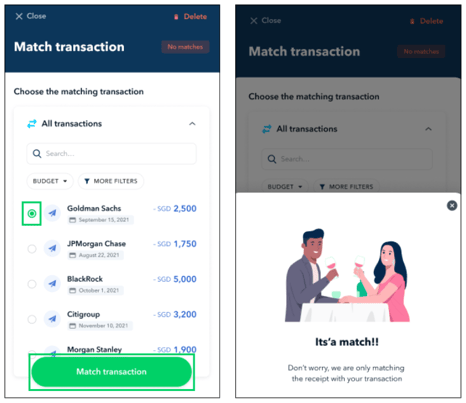
For ![]() receipts, manually search for the transaction. Once you have selected the correct transaction, simply click on the "Match transaction" button.
receipts, manually search for the transaction. Once you have selected the correct transaction, simply click on the "Match transaction" button.
Note! Admin and Finance users have access to view all receipts uploaded to the Aspire account on the Match uploaded receipts page. However, employee users can only view their own uploaded receipts on this page.
How to enable or disable auto-match receipts to transactions
The auto-match receipt feature speeds up the matching process between uploaded receipts and transactions in the Aspire account by analyzing the receipts and suggesting potential matches with transactions.
Admin and Finance users can enable and disable this in-app by following these steps:
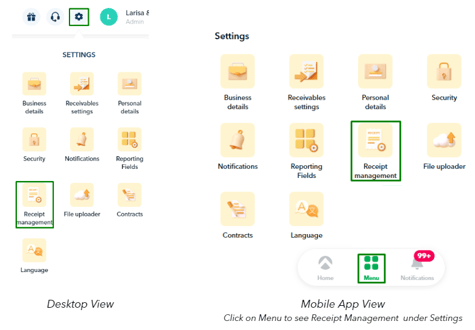
1. Click Settings button, then select "Receipt Management"
2. Toggle the “Auto-match receipts” button

Tip! To conveniently access the Receipt Management feature in the future, you can add it to your Quick Access in the Dashboard. Simply click on "Add", search for "Receipt Management", put a check on the feature, and click "Save".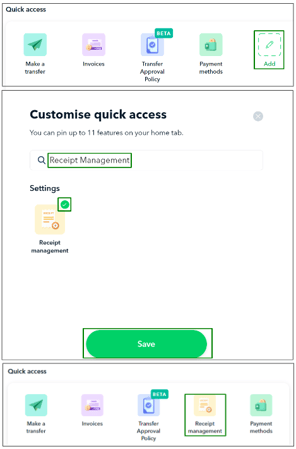
Questions? Please log in to the app and reach out in the chat at the bottom right corner of the screen.
Suggestions? Let us know here.